Practical guide
Render Damage Near Downpipes: Causes and Repairs
Render beside a downpipe often fails before the rest of the wall. Leaking joints, overflowing hoppers, brackets drilled into the render and pipes that discharge against the base of the wall all put water exactly where render is weakest. Fix the water first, then repair the render; doing it the other way round means repairing it twice.

On this page
How downpipes damage render
A downpipe is meant to carry roof water past the wall without touching it. K Rend's design guidance for rendered walls says gutters and downpipes must be designed to keep water off the façade, and it warns against letting downpipes throw water onto render while it is still setting. When a joint leaks, a hopper overflows or a pipe is cracked, water runs down the render in the same line every time it rains.
That water soaks in through fine cracks and around bracket fixings, where holes drilled through the render give it a direct path to the brick. Over winters, freezing water and the loss of bond turn a streak into a hollow patch and then into render that falls away. A downpipe that ends at the base of the wall, rather than in a gully, splashes the bottom of the render and keeps it wet.
The extent of the repair follows what tapping finds. A small hollow patch beside the pipe needs a local repair, cut back to sound render and rebuilt. Replacing a whole elevation is only justified if the hollow areas spread well beyond the pipe, and that should be explained as a separate finding rather than assumed from one stain.


Watch the pipe in heavy rain and note where water escapes.
Repair or replace the leaking joint, hopper, bracket or pipe.
Let the wall dry, then tap-test around the stained area.
Cut out hollow render and rebuild it in matching coats.
Refit brackets with sealed fixings and recolour to a natural break.
Reading the marks
Each pattern points somewhere. A narrow streak from a joint downwards means a leaking joint. A broad wet area spreading from the top of the pipe suggests an overflowing hopper or gutter outlet. Rust-coloured or dark spots around brackets suggest water getting in through the fixings. Damp and blown render only at the bottom of the wall, near the pipe's foot, suggest splash-back or a blocked gully.
Write down what you see in rain as well as dry weather. A mark that darkens after a storm and fades in a dry week is still active.
Moved pipes and old fixing holes
Downpipes are often moved during alterations, leaving a line of old bracket holes in the render. If those holes were filled with something softer or harder than the render, or simply painted over, each one is a small entry point for water. Take a hypothetical house where a pipe was moved a metre to suit a new window: two vertical rows of filled holes and a patch of repaired render may sit beneath one coat of paint.
When the render is repaired, the old holes should be cut out and rebuilt properly, not just filled, and the new bracket positions planned so fixings go into sound render with a sealant around them.
Photographs worth taking
Photograph the whole pipe, from the gutter outlet to the ground, with the wall either side, then close-ups of the damaged render and each joint and bracket. Include the gully at the bottom. Label the wall, so the photograph can be matched to the right pipe on a house with several.
Pipe work, wall work and insulated walls
Fixing the pipe is plumbing or roofing work; repairing the render is rendering work. One firm can do both, but the pipe must be put right before the render repair, and the pipe will usually have to come off the wall while the patch is made and then be refitted on its brackets.
If the wall has external insulation, the repair has to suit the insulation system. Brackets on an insulated wall need fixings designed to pass through the boards without crushing them or letting water in, and INCA lists rainwater goods among the services to be planned for when such a system is designed.
Repairing the render
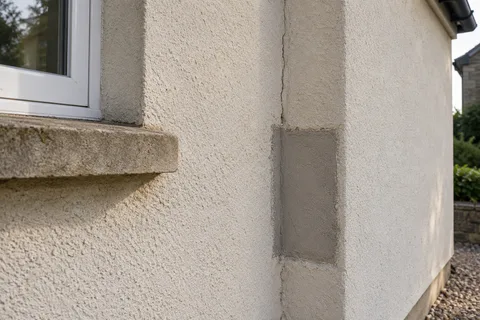
Once the water is stopped and the wall has dried, the hollow area is marked by tapping and cut back to firm render with straight edges. Damaged brick or joints beneath are repaired, absorbent areas dampened, and the patch built up in the same coats as the original so it finishes flush. Old fixing holes in the area are cut out and rebuilt in the same way.
Brackets go back on once the patch has cured. Each fixing hole is a route for water through the render, so fixings should go into sound render with sealant around them, and the pipe should stand slightly off the wall on its brackets so water running down the pipe does not track onto the face. Offsets and shoes at the foot should direct water into the gully rather than against the base of the wall.
Making the patch disappear, or not
A patch in painted render can be repainted with the whole wall, or at least to a corner or another pipe, so it does not show as a rectangle. Through-coloured render and pebbledash are harder to blend and a patch may stay visible. If you want the whole wall to look uniform, a respray after the repairs is the usual route, provided the rest of the render taps sound.
If the damage returns
Keep photographs from before and after, and note what was done to the pipe. If a stain reappears in the same place, start by watching the pipe in rain again, because a joint can fail a second time. A repeated repair without fixing the water is money spent twice. The Rotherham rendering homepage links the repair, wall and recolouring services if the pipe turns out to be only part of the problem.
Common questions
Can I seal a leaking downpipe joint myself?
A joint you can reach safely from the ground can often be resealed or the section replaced. Anything above ground-floor height is better left to someone with proper access. Either way, fix the leak before the render is repaired, and let the wall dry out first.
Should the downpipe be moved away from the damaged area?
Sometimes moving a pipe is the right fix, for example where it was placed to suit a window and now discharges awkwardly. Moving it leaves old bracket holes that must be cut out and rebuilt properly, and the new route needs its own sound fixings. Usually, repairing or replacing the faulty section in the same place is simpler.
Does a cast-iron pipe cause more damage than plastic?
The material matters less than whether it leaks. Old cast-iron pipes can crack at the back where nobody sees, and their joints can fail, so check the back of the pipe as well as the front. Plastic pipes more often leak at push-fit joints or sag where brackets have come loose.
See housing and planning information for Rotherham and nearby places, including the source and geography behind each figure.