Whole-house rendering
House Rendering Rotherham: Re-rendering Every Elevation
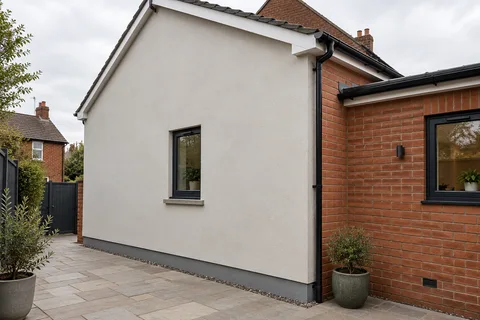
Re-rendering a house means taking every wall through the same sequence: find out which render is still bonded, take off what has failed, mend the brickwork, then build a new system from the bead at the bottom to the eaves at the top. On a semi or terrace it also means working round the neighbours, because your render meets theirs at the party line.

On this page
Signs the whole house needs doing
Patching makes sense while failures are isolated. Once a hammer-handle tap sounds hollow across large parts of several walls, cracks have opened on more than one face, or the base of the render is crumbling all round the house where it runs over the damp-proof course, a full re-render usually costs less disruption than a string of repairs. Faded colour alone is not a reason; sound render can simply be recoloured.
Cracks deserve a second look in this part of South Yorkshire. If cracking is stepped, wide, or comes with doors and windows that have started to stick, do not render over it until the cause is known. GOV.UK's guidance on coal mining subsidence lists cracked plaster and sticking doors among the first signs, says a chartered surveyor can establish whether mining is to blame, and asks owners not to arrange repairs before the mine owner has been consulted, apart from urgent work to prevent further damage. The render repairs page sets out that route.
- Scaffold and protection Windows, doors, paths and planting are covered; downpipes, lights and satellite brackets come off.
- Old finish tested or removed Failed render is removed; the survey decides whether any sound areas can remain within the specified system.
- Masonry repairs and beads Cracked bricks and open joints are repaired; corner, stop and base beads are fixed.
- Base coats Sand-and-cement scratch and float coats, or a manufacturer basecoat with mesh.
- Finish coat A painted, scraped or thin-coat coloured finish, applied in suitable weather.
- Fittings and junctions Fittings are refixed through the new surface; sills, roofline and abutments are sealed.
The usual order of work. The survey and the chosen products decide the actual steps.
From bare brick to finished wall
After the scaffold goes up and the glazing is sheeted, failed render is broken out and the joints and bricks beneath are made good. Where the brickwork is very absorbent, it is dampened to control suction, which K Rend's instructions recommend before rendering. Its cement base coats are applied at the thickness each product specifies, from 4-6mm for its HP12 and HPX bases up to 8-10mm for its UF bases, then straightened with a darby and lightly keyed. The next coat waits at least 24 hours unless the maker says otherwise.
The top coat decides how the house looks and how it is maintained: a scraped through-coloured render that never needs painting, a thin silicone finish with a fine grain, or a sand-and-cement coat that is painted. K Rend recommends a test panel of around 2m² before the main work, and advises starting on the shady side in hot weather and following the sun round, so no wall bakes as it sets.
Tap-test and photograph all elevations; mark failed areas and cracks.
Agree how the render will stop at the party line with each neighbour.
Scaffold, sheet windows and doors, and protect paths and gullies.
Strip failed render and repair joints, bricks and lintel surrounds.
Fix a bell-cast bead clear of the DPC, plus corner, stop and reveal beads.
Damp down, apply and key the base coat, and let it cure.
Apply the finish, shading or sheeting it from rain and frost for two days.
Refit downpipes, lights and alarm boxes; record products and colours.
One house or a whole row
A single private house is planned around one family's access, one set of fittings and one decision-maker. When a landlord or housing provider refurbishes a row or a block under one contract, the same technical steps repeat across many walls, so beads, colours and stopping lines are set out once on drawings and kept consistent from house to house. On attached houses the party line is the key detail in both cases: the new render needs a clean stop bead there, rather than feathering onto a neighbour's dash.
Re-rendering most of a wall also counts as renovating a thermal element under Approved Document L. Above half of a wall, or more than a quarter of the whole envelope, the guidance expects an insulation upgrade where it is technically, functionally and economically feasible, so ask building control whether that applies before the scaffold goes up.
Planning checks
Rotherham has 28 conservation areas, shown on the council's planning maps. National guidance says that rendering or pebble-dashing a house in a conservation area is not permitted development, so it needs a planning application. The council's householder design guide, adopted in October 2025, covers extensions and is worth reading where the re-render accompanies one.
Common questions
Can I re-render my half of a semi if next door keeps their pebbledash?
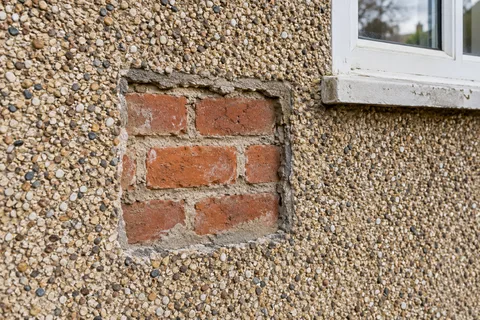
Yes. The new render stops on a bead at the party line, so the two finishes meet in a straight, weather-tight edge. Agree access with your neighbour before work starts, because the scaffold and the bead may sit close to their wall.
See housing and planning information for Rotherham and nearby places, including the source and geography behind each figure.