Silicone render
Silicone Rendering Rotherham: Silicone Thin-Coat Render
A silicone render system is mostly cement: a base coat carries the mesh and does the structural work, and the silicone layer on top is a coloured skin a millimetre or three thick. The skin repels rain and resists dirt; everything else depends on what is underneath. That makes it a good finish for new blockwork, freshly stripped walls and insulated render, and a poor one over render that is already failing.

On this page
What the silicone layer is
K Rend's Silicone TC is a typical example. Its data sheet describes a ready-to-use, cement-free render bound with a silicone resin emulsion and an acrylic dispersion, giving a water-repellent surface that allows water vapour through. It contains a biocide to help prevent moulds, yeasts and algae, and has a low tendency to pick up dirt. The 1.5mm grain gives a fine sandy texture and the 3mm grain a coarser one; either way the finish is laid at the thickness of its largest grain with a stainless steel float, then rubbed up in circles with a plastic float.
Underneath, K Rend's HP14 Base is a polymer-modified cement base coat laid at a nominal 4-6mm, with alkali-resistant mesh embedded where it is needed. A colour-matched primer goes over the cured base and dries for 24 hours before the finish.
- Sound background A background accepted by the specified system. Keeping old render requires a system-specific assessment of its bond and condition.
- Beads Corner, stop and base beads set the edges and straight lines.
- Basecoat with mesh Glass-fibre mesh embedded in the basecoat resists cracking.
- Primer Where the system requires it, tinted towards the finish colour.
- Silicone finish A thin, through-coloured, water-repellent coat that forms the texture.
Wall on the left, finish on the right. Not to scale: coats, thicknesses and primers follow the chosen manufacturer’s system and the condition of the wall.
Where it is the right finish
Silicone suits backgrounds that are going to receive a fresh base coat in any case: a new extension in blockwork, a house stripped back to brick, or the boards of an external insulation system. It is also popular where people want a strong or pale colour without repainting every few years.
It is the wrong choice where hollow render is being kept, because a few millimetres of finish cannot hold loose material to the wall, and where the background is damp or frozen, which K Rend's sheet rules out. It does not change how an old solid wall of soft stone behaves behind a cement base, so take advice on traditional walls.
On a house, and on a larger contract
On one house the main constraint is time. K Rend asks for a fresh base coat to stand at least 14 days before the silicone goes on, so the scaffold stays up for the base to cure, the primer to dry and the finish to be applied. Each wall then has to be finished in one continuous pass to a wet edge, because a dried edge leaves a lap line.
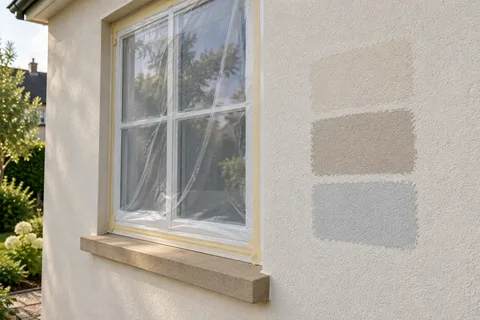
On a row of houses or a block, the same rules decide the programme. Base coats can be laid on several elevations while others cure, but the finish team must be able to complete each face without a break, and weather has to allow it: K Rend sets a minimum of 5°C for wall and air, and no strong sun, wind or rain while the finish dries. A test panel on the first building sets the reference for colour and grain.
Strip or repair the wall and let it dry.
Fix beads at the base, corners and reveals.
Lay the base coat and embed the mesh; leave it to cure for the stated period.
Apply the colour-matched primer and allow it to dry.
Apply the silicone finish to grain thickness and rub up the texture.
Shield the fresh finish from rain and rapid drying.
Keeping it clean
The biocide slows algae but does not stop it forever, especially on shaded walls and near leaking gutters. K Rend's instructions for its finishes suggest a warm wash with a suitable detergent at a pressure low enough not to damage the surface, and a fungicidal wash on elevations that stay wet. Splashes from the ground mark the bottom course, which is one more reason for the bell-cast bead to sit well above paving.
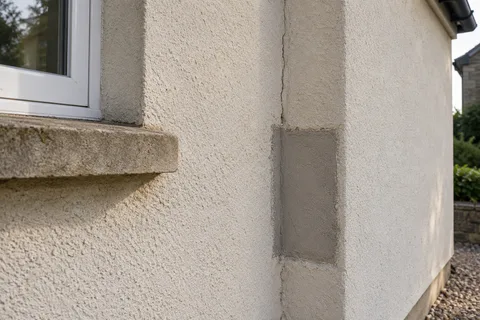
Record the product name, grain size and colour reference when the scaffold comes down. Silicone finishes come in many near-identical shades, and a repair or an extension added years later will only blend if it uses the same system and reference.
Common questions
Why does silicone render need a base coat if the wall is already flat?
The thin finish is not designed to bond straight to bare masonry or bridge its joints. The base coat gives an even, consistent surface, carries the mesh that resists cracking and controls how much water the background draws from the finish.
Is silicone a good finish over external wall insulation?
It is one of the finishes insulation systems use, because the meshed basecoat over the boards gives it the flat, sound background it needs. The whole build-up has to come from the system designer, though, so the finish is chosen as part of the insulation system rather than added afterwards.
See housing and planning information for Rotherham and nearby places, including the source and geography behind each figure.