External wall insulation
External Wall Insulation Rotherham: Insulated Render
External wall insulation puts a layer of insulation boards on the outside of the walls and covers them with a reinforced render, so the house is wrapped in a warm coat rather than lined inside. It is a building project as much as a rendering one: the wall gets thicker, so everything fixed to it has to move outwards, and the details at the base, windows and eaves decide whether it works.

On this page
The system, layer by layer
INCA, the trade association for insulated render, lists the parts: insulation boards, adhesive, mechanical anchors, a reinforcing basecoat with mesh or lath, the finish, and the beads, trims and flashings at every edge. It describes three kinds of reinforcement layer: a traditional thick render on metal lath, typically 20-30mm; a thin polymer-cement basecoat with glass-fibre mesh, typically 6-10mm and the most common in the UK; and a ready-mixed polymer basecoat of about 3-6mm, which needs very flat boards.
Fixings are specified for each wall. INCA recommends pull-out tests on site so the anchor type and number suit the actual masonry, its height and its exposure, and says the system designer should provide existing and proposed U-value calculations.
Openings are the weak points of the reinforcement. INCA's drawings and specifications include extra mesh at corners and patches at the corners of openings, where stress concentrates and cracks would otherwise run diagonally from the window. The finish on top can be a thin coat, a mineral render, a dash or even brick slips, but it always belongs to the same certified system as the boards and basecoat.
- Existing wall Prepared; fittings removed and the base track fixed above ground level.
- Insulation boards Bonded with adhesive and, in most systems, mechanically fixed to the wall.
- Basecoat with mesh Reinforcement mesh embedded across the board joints and around openings.
- Primer Where the system requires it.
- Finish render A thin-coat finish that weatherproofs the insulation.
Wall on the left, finish on the right. Not to scale: coats, thicknesses and primers follow the chosen manufacturer’s system and the condition of the wall.
One house or a whole block
On a single solid-walled house, the survey covers the walls, damp, existing movement joints, fixing strength and every service that will need moving. On a terrace, the system ends at your party line unless the neighbours join in, and INCA points out that breaks in the system create cold bridges and weak points for water; ask how the end of your system will be closed and weathered against next door's wall.
Larger schemes for a landlord or housing provider bring extra checks. INCA's survey list includes building heights, access and the security of residents, the position of fire barriers if required, and notes that installers in a competent person scheme can self-certify compliance with building regulations rather than using building control. Approved Document L sets 0.30 W/m²K as the target for an externally insulated wall in an existing home.
Base, windows, eaves and services
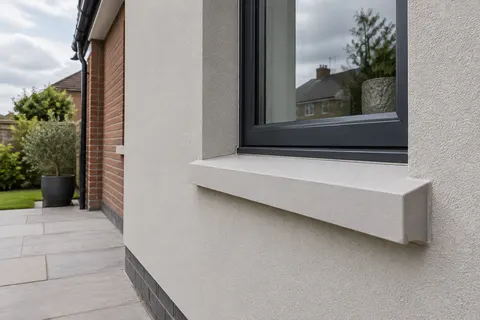
At the bottom, INCA's details fix a starter track at DPC level, with trims around 150mm above the ground to reduce splash-back, and say the DPC should not be bridged. Around windows, new sills should project at least 40mm beyond the finished face, so existing sills often need an over-sill. At the eaves, the roofline may need extending and the roof edge insulated to avoid a cold band. Meters, pipes, lights, cables, satellite dishes and downpipes all have to be moved, extended or refixed.
Weather controls the programme: INCA advises laying basecoats only in fine, dry weather, checking the forecast 48 hours ahead, and keeping finishing coats out of direct sun and strong wind.
Survey walls and services; run pull-out tests; check planning and building regulations.
Move or extend services and rainwater goods; repair the wall.
Fix the starter track at DPC level.
Bond and anchor the insulation boards in the specified pattern.
Lay the basecoat with mesh, adding patches at the corners of openings.
Fit over-sills, beads and trims, then the primer and finish.
Reinstate services and hand over the system details.
Planning and older buildings
National guidance says cladding a house in a conservation area is not permitted development; Rotherham's conservation areas are shown on the council's planning maps. Elsewhere, ask the council whether the new appearance needs permission. On old stone or soft-brick walls that rely on drying out, take specialist advice on moisture before choosing a system.
Common questions
Can EWI go over cracked render?
Only after the cracks are understood. Loose render has to come off so the boards bond to something sound, and a crack caused by ongoing movement needs investigating first; in a former mining area that may mean asking a chartered surveyor whether subsidence is involved.
Do I still need gutters and downpipes moved?
Usually, yes. Downpipes, brackets and anything else fixed to the wall have to come off and be refixed on longer brackets through the finished system, and gutters at the eaves may need repositioning if the roofline is extended. INCA lists rainwater goods among the services to plan for at survey stage.
See housing and planning information for Rotherham and nearby places, including the source and geography behind each figure.