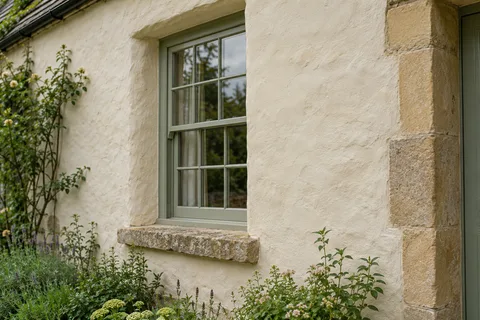
Lime render
Lime Rendering Rotherham: Old Stone and Brick Buildings
Lime render is the traditional coating for walls built before modern cavities and damp-proof membranes, walls that soak up rain and dry out again. It is softer and more permeable than cement, it is laid in thin coats over several weeks, and it needs protecting while it hardens. Where an old wall was rendered before, or its stone is too weak to stand the weather unprotected, lime is usually the right coat; where the stone was built to be seen, the repair is usually to the stone and its pointing instead.

On this page
Should the wall be rendered at all?
Start with the wall's history. SPAB's advice, when cement render is removed from an old building, is that it should generally be replaced: there is a good chance the building was rendered originally, and even if it was not, render may have been added later as necessary protection against the weather. Old photographs, and traces of earlier render or limewash in sheltered corners or under eaves, can show whether a wall was covered before.
A wall that was built to be seen is a different case. Bradford Council's homeowner guide for its conservation areas, written for that district's sandstone buildings rather than Rotherham's, advises against rendering buildings that traditionally have bare stonework, because it robs them of their character, and warns that render and paint can trap water in stone and cause damp. It points instead to repointing failed joints and replacing only stones that are deeply eroded, fractured or spalled. If the trouble on a bare stone wall is loose pointing or a few decayed stones, that repair, not a new coat, is usually the answer.
Changing a bare stone house to a rendered one in a conservation area also needs planning permission under national guidance, so talk to the council's planning team before deciding.
- Stone or brick masonry Cleaned of loose material and dampened so it does not draw water out too fast.
- First (scratch) coat Often haired; scratched to give the next coat a key.
- Second (floating) coat Applied once the first has firmed up; follows the line of the wall.
- Finish coat Thin final coat, kept damp and shaded while it cures.
- Limewash or mineral paint Optional decoration that keeps the wall permeable.
Wall on the left, finish on the right. Not to scale: coats, thicknesses and primers follow the chosen manufacturer’s system and the condition of the wall.
Lime or cement: how to tell and why it matters
SPAB's guidance is that a building put up before about 1800 most likely had a lime render originally. Lime finishes look softer and less uniform than cement, with gentler corners, and they weather by eroding back slowly, whereas cement renders tend to crack, fail in patches and come away. If your old stone wall has a hard, grey, cracked render with damp patches or salt staining beneath it, it is probably cement, and it may be holding water in the wall.
Removing it is not automatic. SPAB suggests a small trial area first, leaving cement that is still well stuck, and sometimes only removing the bottom of the wall and the hollow patches. Where it does come off, it should generally be replaced: SPAB says leaving an old wall bare is usually a mistake, because it was probably rendered for weather protection.
The coats, one at a time
Mike Wye's guide shows how a lime render is built on its own mortars. Deep holes are packed with haired lime mortar first. The wall is misted with water half an hour before each coat. A thin harl coat of about 3mm is thrown on to key to the stone and left a day to harden; a 15mm scratch coat of haired mortar follows, combed for grip and left for about a week; then a 10mm float coat. The guide adds pozzolan to the mortar on exposed elevations for a harder, more frost-resistant result.
Each coat should be green hard before the next, meaning it resists a fingernail. Where render crosses a timber lintel, the guide counter-battens it with lath rather than rendering straight onto the wood.
Trial-remove a small area of cement render and inspect the stone.
Take off failed cement carefully and let a saturated wall dry.
Repair joints and decayed stone; lath over timber lintels.
Mist the wall and apply the harl coat.
Apply the haired scratch coat, comb it and let it firm.
Apply the float coat, then limewash once the render has hardened.
Protecting the work
Lime gains strength slowly by carbonating, taking carbon dioxide from the air over months. Until then it is vulnerable. Mike Wye's guide asks for each coat to be shielded from hot wind, strong sun and rain, covered with hessian for as long as needed, and not laid below 5°C if frost is possible. SPAB warns that a wall freed from cement may carry salts that the new lime draws out, so patches of re-rendering after a couple of years are not a sign of poor work.
In practice that means planning lime work between spring and early autumn, leaving scaffold sheeting and damp hessian in place between coats, and misting the render in warm weather so it does not dry before it has begun to harden.
Finishes and permission
Limewash is the natural finish: Mike Wye allows four coats and expects recoating every three to seven years, with silicate paint as a tougher breathable option. SPAB advises against modern paints and colourless water repellents on lime. Rotherham has 28 conservation areas on its planning maps; national guidance says rendering a house in one is not permitted development, and a listed building needs listed building consent for alterations affecting its special architectural or historic interest. Outbuildings within the grounds of a listed house may be covered too, so check before starting.
Common questions
Can I patch a lime render with ready-mixed cement?
It is best avoided. A cement patch is harder and less permeable than the lime around it, so moisture and movement concentrate at its edges. SPAB notes that lime mixes with a hydraulic set can be used for patching where old render can only partly be removed.
How long does a lime render job take?
Longer than cement. Allowing roughly a day for the harl and up to a week each for the scratch and float coats, as Mike Wye's guide does, plus protection time and limewashing, a single elevation can take several weeks of programme even though the hours on the wall are modest.
See housing and planning information for Rotherham and nearby places, including the source and geography behind each figure.