Practical guide
Replacing Pebbledash on Only Part of a Property
Replacing pebbledash on one wall, or on your half of a semi while the neighbour keeps theirs, is a common and sensible job. It needs a clean edge between old and new, care not to damage the dash that stays, and an honest view of what the new finish will look like beside the old.

On this page
Partial replacement as a finished job
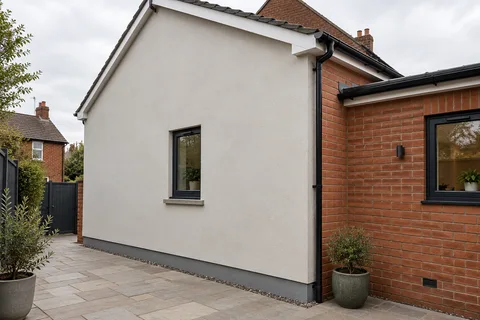
Stripping one wall does not leave the house half-done, provided the edge is planned. The renewed face should end at a corner, a bead or another natural break, and the retained dash beside it should be checked and left sound. On a semi, the party line between the two houses is the natural edge, finished with a stop bead.
Expect a visible difference. A new smooth or scraped render beside old pebbledash will not look the same, however close the colour; new dash beside old dash rarely matches either. Some owners like the contrast; others recolour both surfaces afterwards. Either is fine if it is decided before work starts, and judged against the actual retained pebbledash, not a chart.
There is also a difference between a permanent partial scheme and the first stage of a whole-house job. A permanent one needs a durable edge now; a first stage needs a sound temporary edge that will be cut back when the next wall is done.

Tap-test the dash on every wall and agree which faces are renewed.
Mark the edge at a corner, bead line or party line.
Cut a clean line at the edge before stripping.
Strip, repair and re-render the chosen faces.
Seal and finish the retained edge and record the work.
What sits under the dash
You cannot see what is under a dashed wall until it is opened. It may be decent brick, common brick, old repairs, filled openings or brick faces damaged when the wall was originally hacked to key the dash. A trial patch on the wall to be stripped shows how the dash comes away and what the brick is like.
K Rend's instructions show why stripping is heavy work: its own dry dash sits on a base coat of 8-10mm with a butter coat of about 8mm holding the stones. Old site-mixed dash is similar, two coats of cement render with the aggregate in the top one.
Where to put the edge
A corner is the best edge, because the change of finish reads as deliberate and a corner bead gives a straight line. A party line between attached houses is the next best. A line across the middle of a wall is the weakest, both visually and technically, and should be avoided unless there is a feature such as a downpipe or a change in the wall to hide it.
Use a photograph of the whole elevation to mark exactly where removal stops, including returns and reveals. A description like the front part leaves too much to interpretation.
Protecting the dash that stays
Before stripping starts, the edge is cut cleanly so that breaking out the old dash does not crack or loosen the panel beside it. SPAB's warning about cement removal applies to the retained side too: levering off large sheets can pull material away beyond the line. Work towards the edge carefully by hand rather than with heavy breakers.
Once the new render is on, the edge of the retained dash needs to be sealed under the bead so water cannot get behind it. Check the retained dash for hollow spots close to the edge; if it sounds hollow there, the line may need to move to the next sound point.
Debris, dust and neighbours
Stripping even one wall produces a lot of heavy, sharp debris and dust. Sheet the scaffold, protect windows and vents on both houses, and agree with the neighbour when the noisiest work will happen. Plan where the skip goes and how barrows reach it, especially at the rear through a shared passage.
The new finish
After repairs, the stripped wall receives a new system: a base coat and a scraped monocouche, a base coat with a silicone thin coat, a sand-and-cement render for painting, or a new dash if you want to stay close to the neighbour's look. K Rend's roughcast guidance is to mix enough for the whole area at once and not to go back over half-set areas to fill misses, both of which cause patchy colour.
The base of the new render should stop above the DPC on a bell-cast bead, even if the old dash ran down to the ground. If you want both old and new to share a colour, a respray across the retained dash and new render is a separate step, once the retained dash has been checked as sound.
Treat the stripped face as a wall rendering job in its own right: name the system, and fix the stop bead at the party line, the corner bead and the bell-cast bead at the base before the first coat goes on.
A worked example
Imagine a hypothetical semi where the front dash is hollow and shedding stones, while the side gable and the neighbour's front are sound. The owner strips the front only. The edge runs down the party line on a stop bead and round the front corner onto the gable, also on a bead. The front is repaired, base-coated and finished in a scraped render in a colour picked from a panel held against the neighbour's dash. The gable stays as it is, cleaned and treated for algae.
Records for later work
Photograph the stripped wall, the edge detail and the finished transition, and note the products on each side. If the rest of the house is done later, those records help the next stage start from facts, though the next wall still needs its own tapping and trial. The Rotherham rendering homepage links the removal, rendering and recolouring services involved.
Common questions
Does my neighbour have to agree if I strip my half of the semi?
The wall on your side is yours to work on, but the party-line edge, the scaffold and the dust affect them. Agree access and timing in advance, and agree where the bead line sits so neither house is left with a damaged edge.
Can I paint the new render and the old dash the same colour?
Yes, if the retained dash is sound and the new render has cured. Painting both brings the colour together, though the textures stay different. Check the dash by tapping first; a coating over hollow dash will fail with it.
What if the retained dash starts to fail at the edge later?
Cut it back to the next sound point and extend the bead line. That is why the edge is best placed at a corner or the party line: if the remaining dash eventually needs replacing too, the next wall can be done without disturbing the new one.
See housing and planning information for Rotherham and nearby places, including the source and geography behind each figure.